
Lazy Lake Tutorial


This tutorial by all means created and completely my inspiration. Any similarities from this tutorial is only by coincidence.
I found the blings and mask somewhere on the internet, but I don't remember where. If the creator of this bling visits my blog and sees it here please by all means send me an Email so that I can give you the credit and I'll also post a link to your page.
I thank the makers of the materials from this tut for their awesome work. I would not have made this without their help.
This tut was made on version X8.
Materials:
Open the 'Lazy Lake jls zip'.
Place jls stained glass green in your texture folder.
Place @nn_230610_mask_025_tdstudio in your mask folder.
Place jls stained glass green in your picture tubes folder.
Download Jasc Animation Shop HERE. Install.
Place your Animation Shop program where ever you'd like on your pc.
Place sparkle.8bf into your plugins folder.
(or go to Plugin Filters Unlimited 2.0 download HERE)
For the gradient (Step 2): Materials Palette, foreground #d7d377, background #353c17, linear, angle 45. You will be following steps 1, 2, and 3 a total of 3 times saving each time as: Painting 1, 2 and 3 the only difference will be for step 2 as follows
Painting 1 = The gradient repeat is 0
Painting 2 = The gradient repeat is 1
Painting 3 = The gradient repeat is 2
**********
STEP 1
1 - Open Lazy_Lake_painting_jls.jpg (or any other image you would like to use. Then resize it to 358x277) and name the layer "painting"
2 - Menu bar> layers> duplicate painting layer. Menu bar> Effects> 3D Effects> Cutout, Vertical, Horizontal both = 10, Opacity - 81, Blur 10, shadow color #575f3a. Menu bar> layers> duplicate painting layer again. V,H = -10

-----At this point you can either continue OR Menu bar> image> picture frame> jls stained glass green. Then skip down to STEP 3/4. -----
4 - Menu bar> image> add Borders> size 1, color black #000000 symmetric checked.
5 - Image> add Borders> size 15, color white #ffffff symmetric checked.
6 - Go to toolbar, Magic Wand. Click on the white border.

**********
STEP 2
Open the materials palette and use the setting above for the gradient.
**********
STEP 3
1 - Toolbar> flood fill the white border, do not deselect.
2 - Menu bar> effects> texture effects> texture and choose jls stained glass green.
3 - Menu bar> effects> 3D effects> inner bevel.

4 -Control+D to deselect. Menu bar> image> resize> 358x277
5 - Save as Painting ?.jpg
**********
STEP 4
1 - Open a new transparent file 600x464. Menu bar> file> Save as> Lazy Lake.pspimage. (remember to save regularly)
2 - Open your materials palette, make the gradient once again angle 45 and repeats 0. Toolbar> flood fill Raster 1.
3 - Menu bar> layers> duplicate Raster 1. Activate raster 1 layer, Menu bar> image> flip> horizontal. Menu bar> image> Flip> Vertical.
3 - Activate 'copy of raster 1', Menu bar> layers> load/save mask> load mask from disc. Choose the mask @nn_230610_mask_025_tdstudio

4 - Activate layer group - copy of raster 1, Menu bar> layers> merge> merge all flatten.
5 - Open 'Painting 3', Menu bar> edit> copy, Activate Lazy Lake.pspimage, Menu bar> edit> paste to Lazy Lake.pspimage. Name this layer 'Painting 3'.
6 - Open 'Painting 2', Menu bar> edit> copy, Activate Lazy Lake.pspimage, Menu bar> edit> paste to Lazy Lake.pspimage. Name this layer 'Painting 2'.
7 - Open 'Painting 1', Menu bar> edit> copy, Activate Lazy Lake.pspimage, Menu bar> edit> paste to Lazy Lake.pspimage. Name this layer 'Painting 1'.
**********
SETTING THE GUIDES
1 - Turn your rulers bar on. Menu bar> view> rulers.
2 - Turn on your Guides. Menu bar> view> guides.
3 - Hover your cursor on the LEFT ruler until it becomes a + sign.

4 - Left click and hold, drag over to your image and release.
5 - Double click on the blue line on your ruler.

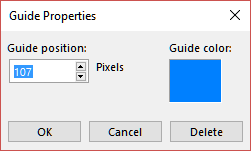
7 - Repeat 3-6 as for the TOP ruler and make the guide position: 174.
**********
POSITIONING THE PAINTINGS
1 - Activate the Painting 1 layer and Toolbar> pick tool (or type K).
2 - Move the layer over to the blue guide line. When the top and left edges of the layer turn red/blue then it is perfectly aligned.

3 - Do these same steps for Paintings 2 and 3. Guide lines will be:
Painting 2 - Horizontal guide = 117, Vertical = 242
Painting 3 - Horizontal guide = 36, Vertical = 42
4 - Duplicate Painting 3 layer, Menu bar> layers> arrange> move down.
5 - Menu bar> image> Flip> Horizontal. (no worries, no one will see this image except for the top right corner)
6 - Set new guide lines: Horizontal guide = 69, Vertical = 171.
Hover your cursor on either ruler and double click, choose the guides tab, Delete Guides checked, ok.
**********
At this point you can choose to skip down to the FRAME step OR continue with adding the blings.
**********
BLINGS
1 - Open the file bling01_sigrid.
2 - Activate layer Kopie (2) von Raster 2, Menu bar> edit> copy. Activate Lazy Lake.pspimage. Activate the top layer. Menu bar> edit> paste onto Lazy Lake.pspimage.
3 - Menu bar> image> flip> horizontal.
4 - Menu bar> object> align> bottom.
5 - Menu bar> object> align> left.
6 - Menu bar> layers> duplicate, Menu bar> image> mirror> horizontal.
7 - Menu bar> image> mirror> vertical
8 - Menu bar> layers> merge> merge down.
9 Then name this layer bling 1. Turn off visibility for bling 1.
10 - Activate bling 01 sigrid.pspimage file. Activate layer Kopie von Raster 2, Menu bar> edit> copy. Activate Lazy Lake.pspimage Menu bar> edit> paste.
11 - Repeat 3-8. Then name this layer bling 2. Turn off visibility for this layer.
12 - Activate bling 01 sigrid.pspimage file. Activate layer Raster 2, Edit> Copy> Paste onto Lazy Lake.pspimage.
13 - Repeat 3-8. Then name this layer bling 3. Turn off visibility for this layer.
FRAME
-----At this point you can either continue making your frame OR Menu bar> image> picture frame> jls stained glass green. Then skip down to ANIMATIONS or finish and save. I'd love to see what you have created and post it under this tutorial as a sample.
-----
2 - Menu bar> image> add borders> size 15, color white #ffffff symmetric checked.
3 - Go to toolbar, Magic Wand. Click on the white border.
4 - Open the materials palette and use the setting above for the gradient.
5 - Toolbar> flood fill the white border, do not deselect.
6 - Menu bar> effects> texture effects> texture and choose jls stained glass green.
7 - Menu bar> effects> 3D effects> inner bevel. Then Menu bar> selections> deselect or Control+D.
ANIMATIONS
1 - Make sure visibility for layers bling 2 and 3 are off.
2 - Make sure visibility of bling 1 is on,
3 - Menu bar> edit> copy merged. Activate the very top layer.
4 - Menu bar> edit> paste as new layer.
5 - Menu bar> effects> Plugins> '<I.C.NET Software>"> Filters Unlimited 2.0, click on randomize, Apply.

6 - Menu bar> file> save as Painting jls 1.jpg
7 - Turn off visibility for top merged layer and bling 1 layer and turn on visibility of bling 2.
8 - Repeat 3-5.
9 - Menu bar> file> save as Painting jls 2.jpg
10 - Turn off visibility for bling 2 and turn on visibility of bling 3.
11 - Repeat 3-5.
12 - Menu bar> file> save as Painting jls 3.jpg
13 - Open your Animation Shop program.
14 - Menu> File> Open Painting jls 1.jpg
15 - Open your file folders and go to where you saved your images on your pc. Right Click on Painting jls 2.jpg, click on copy.

16 - Open Animation Shop Menu bar> Paste After Current.

17 - Go back your file folders and go back to where you saved your images again. Right Click on Painting jls 3.jpg, click on copy.
18 - Back to Animation Shop Menu bar> Paste After Current.
19 - Now to view your animation. Menu Bar> View Animation. Awesome! lol

20 - Save your Animation as what you'd like.

I'd love to see what you have created and I'll post it under this tutorial as a sample. (you don't have to do every step. You can skip steps and add your own)
I gotta give so much thanks to Riona for testing this tut for me. Here is her most beautiful banner.

No comments:
Post a Comment